
Our East Coast fall road trip held many memories. We drove past bright fall leaves and along windy coasts. The Chickamauga Battlefield Auto Tour provided the strongest moment, as it came from a quiet road in the north Georgia woods. It is part of the Chickamauga and Chattanooga National Military Park.
The Chickamauga Battlefield Auto Tour runs just seven miles. It meant so much more than that. A basic drive turned into a moving self-tour. We laid the map on the dash. It traced the 1863 fight, one of the Civil War’s worst. The tale came alive bit by bit.
This post may contain affiliate links, meaning if you purchase something through one of these links, we may earn a small commission at no extra cost to you! Read the full disclosure policy here.

Table of Contents
Know before you go on the Chickamauga Battlefield Driving Tour
Before setting out on the Chickamauga National Military Park auto tour, here are a few things we found helpful:
- Length: About 7 miles, but plan 3-4 hours if you stop often (and you should).
- Hours: The park grounds are open from dawn until dusk. Visitor Center hours vary. Check the official NPS website for alerts.
- Cost: FREE. There is no entrance fee for the driving tour (a small fee applies for the Wilder Tower climb and the Visitor Center film).
- Download the NPS App: The park has an excellent multimedia tour. Pull up the stop number on your phone for narrated stories, historical photos, and firsthand accounts right where they happened.
- Pet Policy: Pets must be on a leash no longer than 6 feet at all times. Pets are not allowed inside any park buildings, including the Visitor Center and restrooms. They are also prohibited from the park’s cemetery areas.
- Best time to visit: Season: Fall is ideal. Cooler temperatures, golden leaves, and fewer crowds made the experience even more reflective.
- Road conditions: fully paved and well-marked, suitable for all vehicles.

PRO Tip: Check the Chickamauga & Chattanooga National Military Park website for special events, like anniversary lantern tours or living history demonstrations, which can be a fantastic time to visit for a deeper dive.
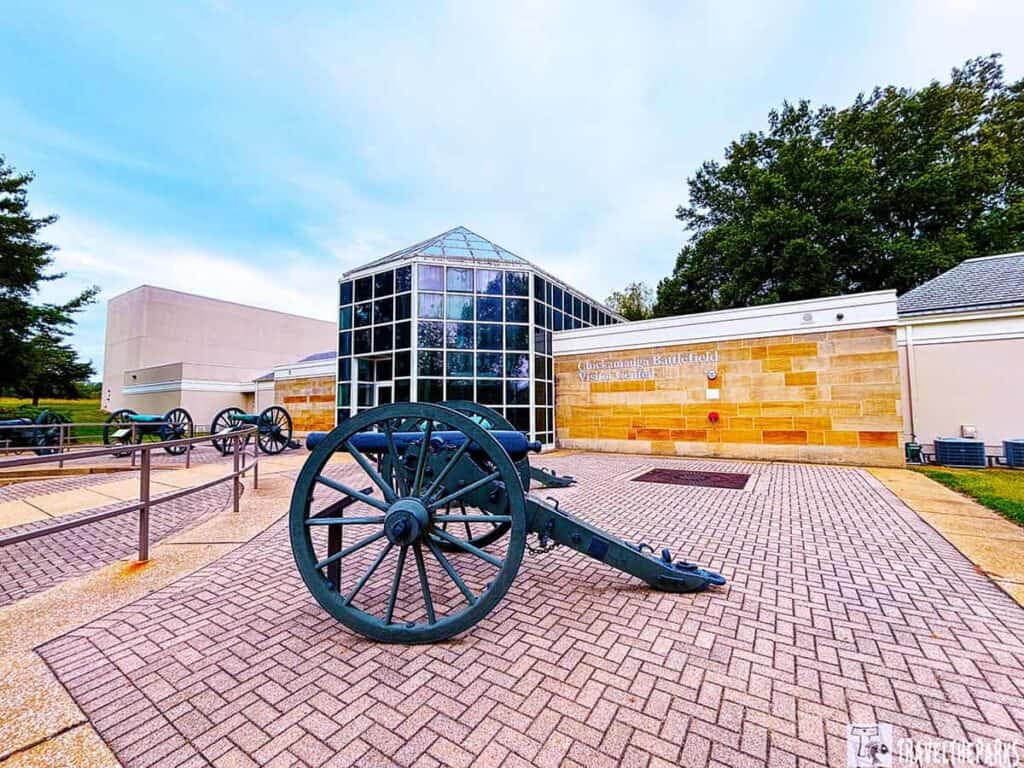
Start at the Chickamauga Battlefield Visitor Center
To get the richest experience, we highly recommend starting your self-guided car tour at the Chickamauga Battlefield Visitor Center. This isn’t just a quick stop—it’s what set the stage for everything we saw. Inside, we grabbed the official tour map and watched a short film that helped us grasp the battle’s vast and complex scale. The museum displays, packed with artifacts from uniforms to a sobering collection of period firearms, along with soldiers’ personal tales, put real faces to the past.

A particular highlight was the seven-minute animated battle map. Watching the lines of advance and retreat pulse across the terrain made the strategies and chaos of those three days click into place in a way static signs simply couldn’t. We also spent a few minutes with a park ranger, whose tips helped us plan our time at the key stops. This foundational visit gave us the essential facts, names, and context, transforming our later 7-mile drive from a simple scenic loop into a profound journey through history.
Chickamauga Driving Tour Stops (In Order)
Before setting out on the Chickamauga Battlefield Auto Tour, we stopped by the Chickamauga Battlefield Visitor Center to pick up a map. From there, we simply followed the arrows on the tour signs along the road, which guided us to each stop across the park.
Each stop includes a wayside panel describing what took place at that exact location. For deeper context, additional information for every stop is available at chch.stqry.app or by dialing 585-672-2619. As we learned early on, much of this self-guided auto tour of Chickamauga focuses on the pivotal fighting of the battle’s last day, September 20, 1863.
We visited Chickamauga this past fall and followed the driving tour in order. Below, you’ll find the primary stops from our trip, along with a downloadable checklist we created to help you organize your visit.
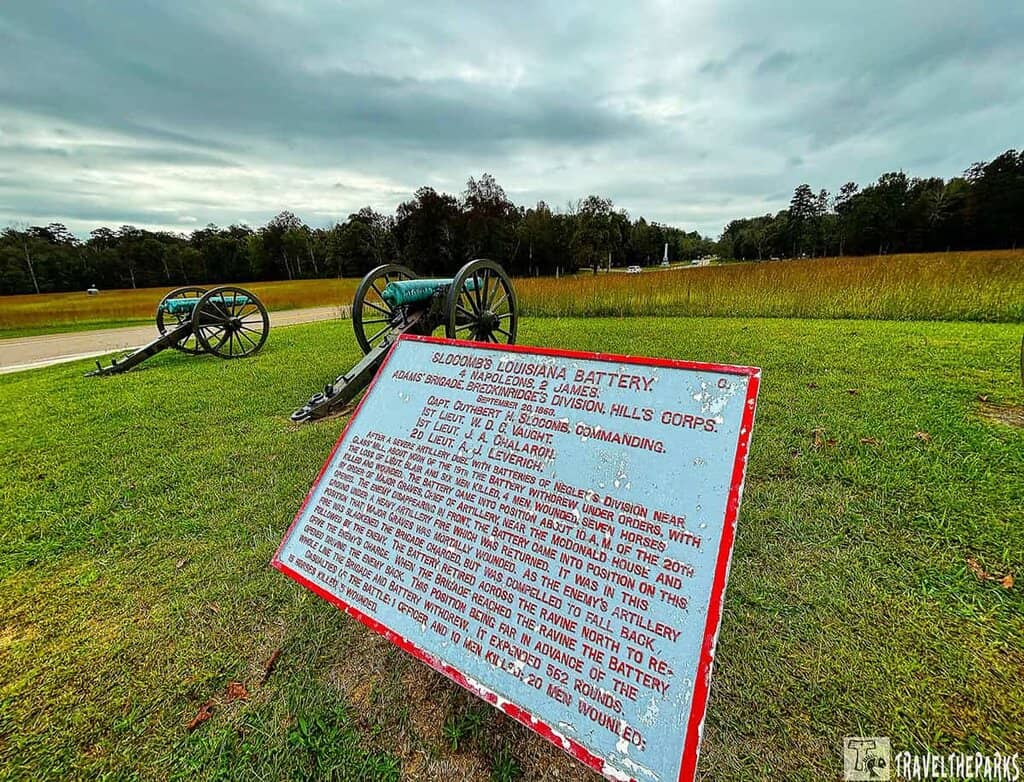
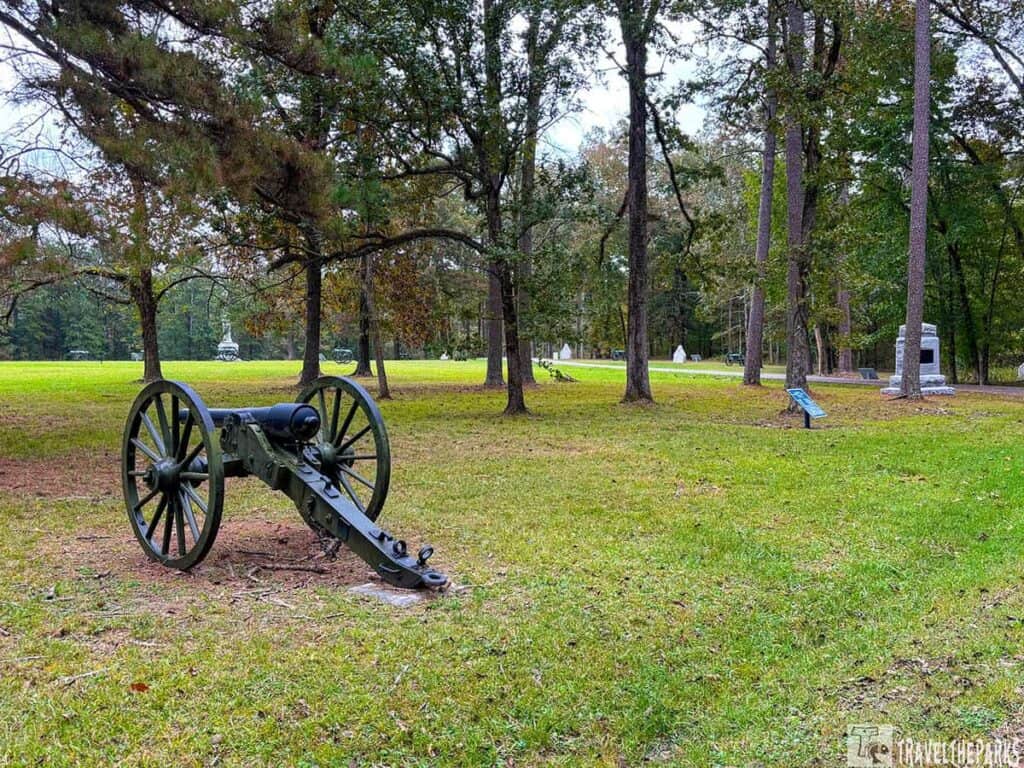
Stop 1: The Battle Begins: Breckenridge Assault
Our tour began right here, where the rolling landscape set the stage for all that followed. At this first pull-off, we tried to comprehend the early Confederate advances, including the assault led by former U.S. Vice President John C. Breckinridge that punched a temporary hole in the Union line before the attackers wheeled south. We also felt the looming presence of those unforgiving woods—the same woods that would define the entire conflict.
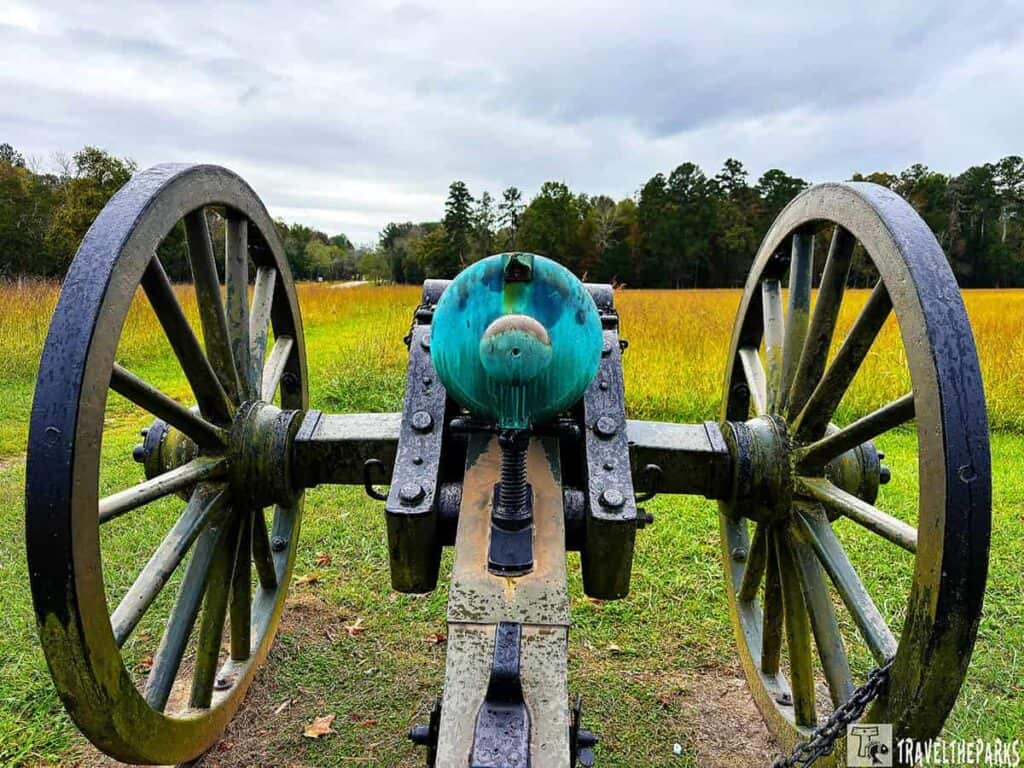
The start felt oddly calm, a sharp contrast to its bloody past. Standing by the silent monuments and still cannons, the chaos that once reigned here seemed impossible to picture. We paused to catch our breath and find our bearings before pressing ahead.

Stop 2: The Battle Line
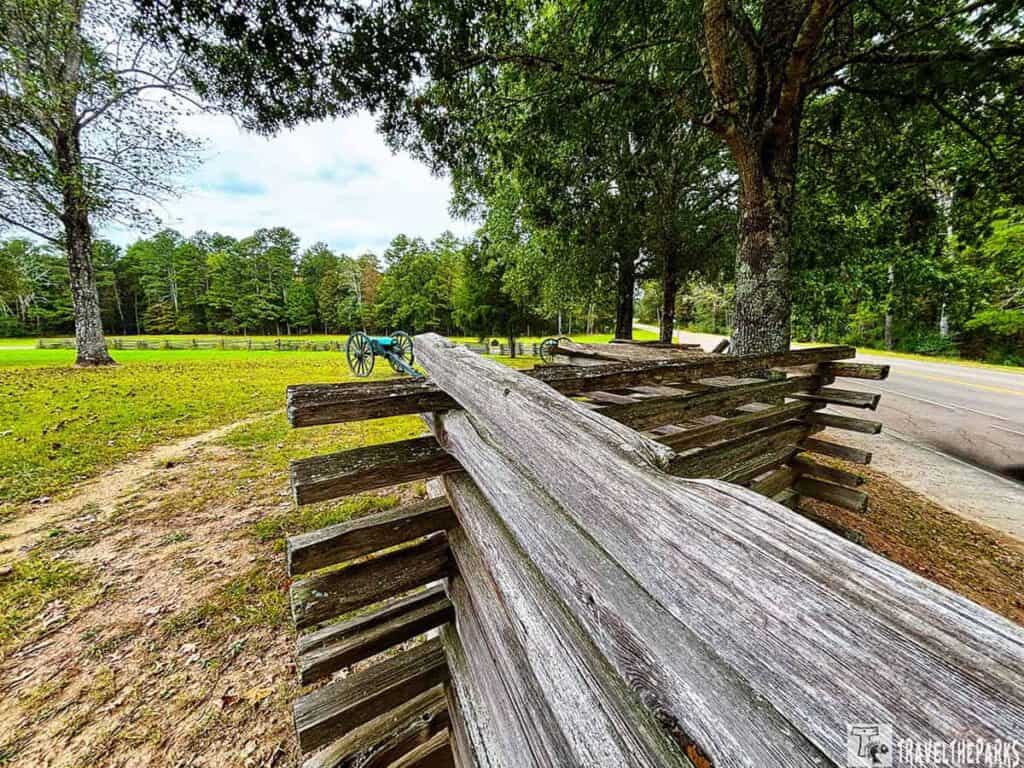
We looked across the fields to where General Bragg’s army deployed. This stop helped us appreciate the immense challenge of command in such thick forest—a theme we’d encounter again and again. This area marks one of the battle’s opening clashes. The wooded surroundings feel unchanged, and in that stillness, it was easy to picture soldiers moving through the trees.
A line of Union monuments now traces Battleline Road, marking where soldiers hastily built breastworks at dawn. From this fortified position, they repelled wave after wave of Confederate attacks.
Stop 3: Poe Field: Mixup in Union Command
At approximately 11:00 a.m. on September 20, a false report reached Union commander Maj. Gen. William S. Rosecrans, incorrectly stating that Brig. Gen. John M. Brannan’s division had left a gap in the line. In reality, Brannan’s men were positioned correctly—their line, now marked by monuments along this road, lay concealed in the woods behind you.
Rosecrans seized on the error, ordering Brig. Gen. Thomas J. Wood’s division leftward to reinforce the line. Earlier that day, Wood had been reprimanded for moving too slowly. This time, he shifted with haste—but in doing so, he opened a real quarter‑mile gap in the Union front.
At that very moment, Confederate Lt. Gen. James Longstreet was massing his forces for a major assault. It would strike directly into the newly created breach.
Standing here now, the terrain tells the story. Looking south, we tried to picture that fatal quarter‑mile gap where Wood’s men had been. The gentle slope and open woods—so quiet today—are what Longstreet’s eight brigades stormed through. A line of silent monuments along the road marks where the Union line fractured, a permanent record in stone and iron of the moment the battle turned.
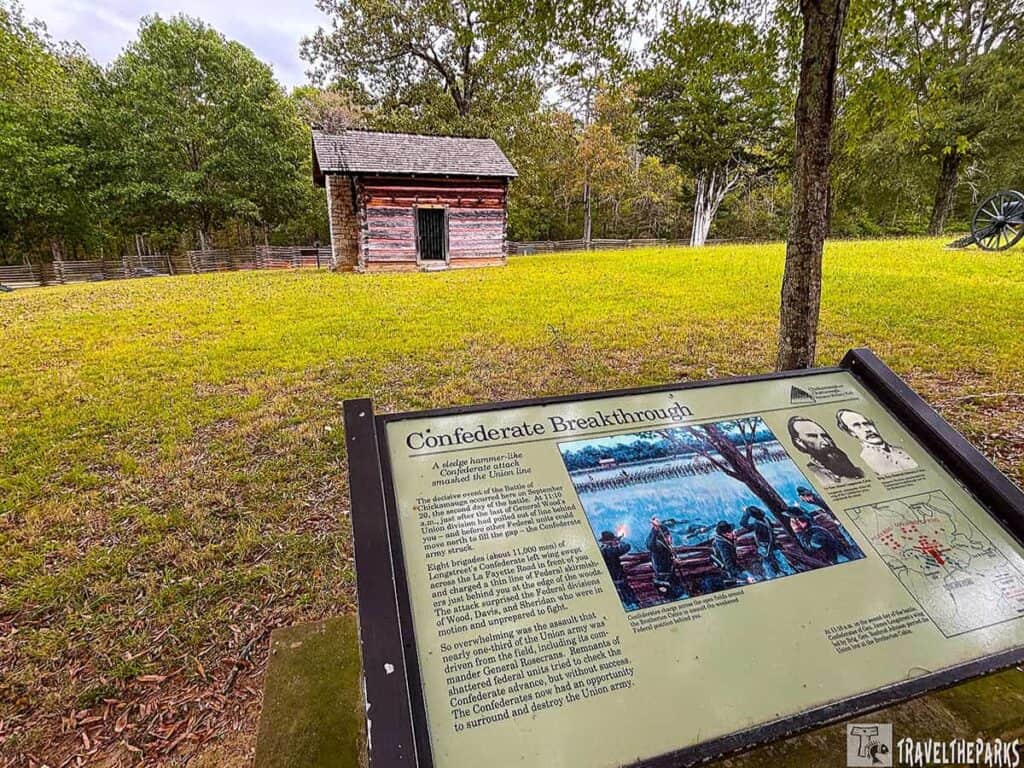
Stop 4: Brotherton Cabin: Confederate Breakthrough
We parked and walked to the reconstructed cabin. This was the undeniable epicenter of Longstreet’s massive breakthrough. Standing in that simple yard, we felt the profound weight of history. It was one of the most powerful, somber moments of our entire drive.
This open field, one of the tour’s most significant stops, was central to the battle’s turning point. We lingered here longer than expected, the space heavy with consequence. Before Union troops could fill the fatal gap, the yells of thousands of Confederates pierced the air. They poured across the Lafayette Road and through the breach, an onslaught that ultimately split the Union army in two.
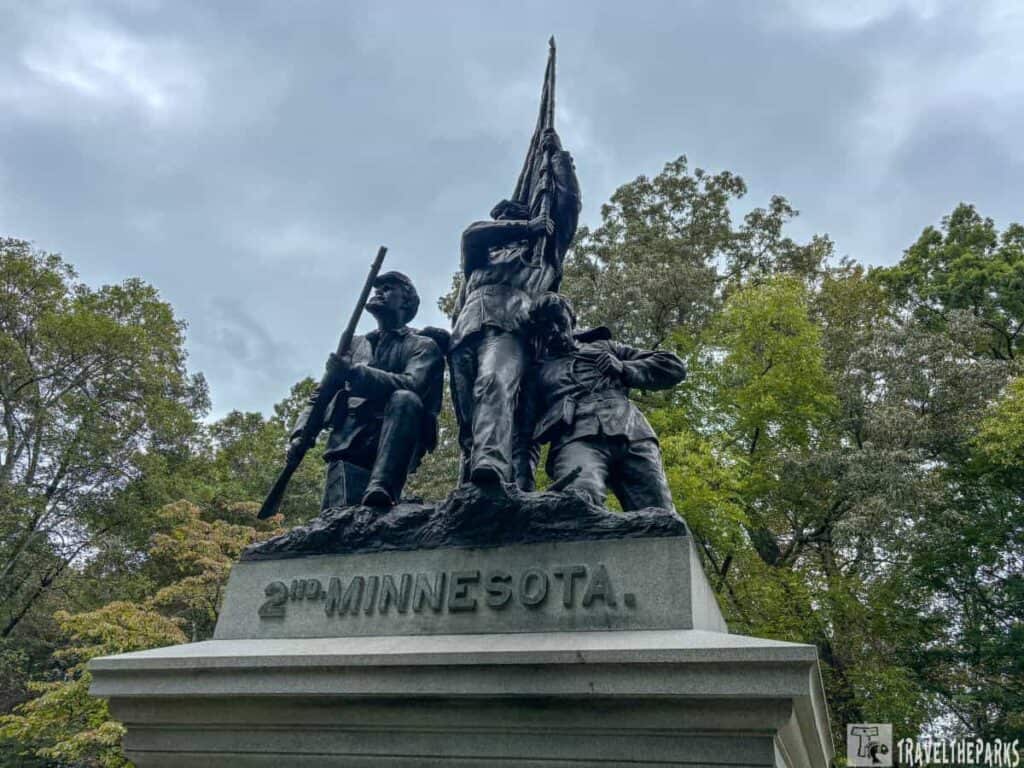
Stop 5: Heg Memorial and Viniard Field
This ground felt different. Though the Confederate breakthrough is noted across a large part of the battlefield on September 20, the battle’s most ferocious yet chaotic fighting took place here on September 19. Where the forest met the fields, it was simple to envision the Lafayette Road battles.
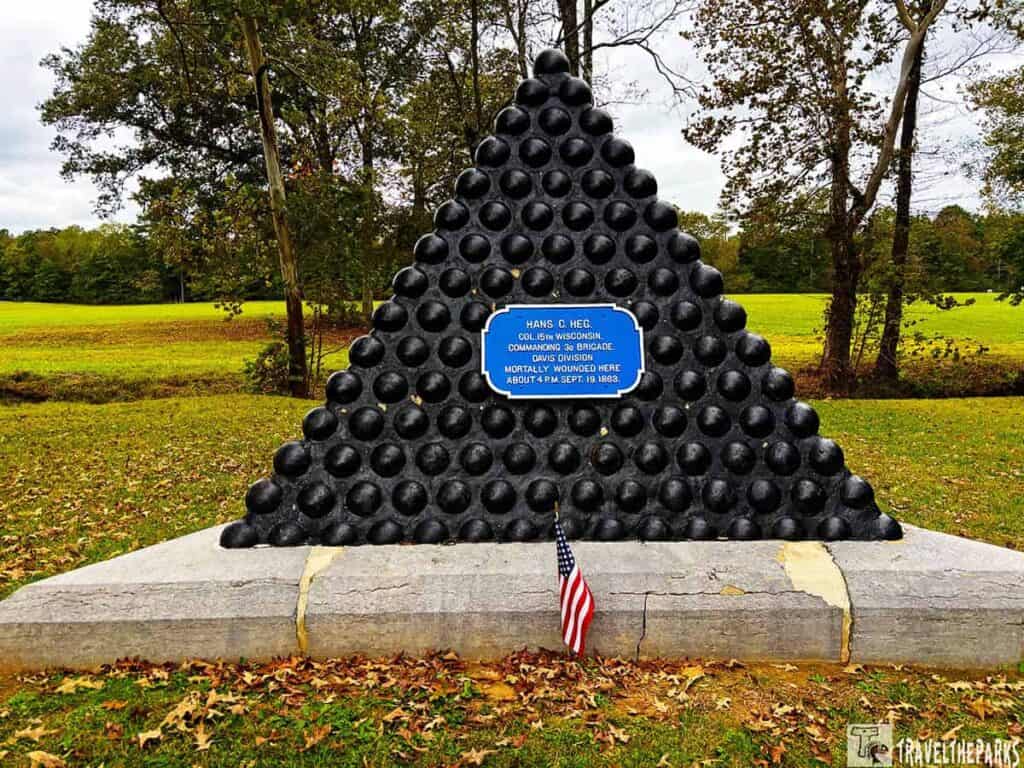
For us, the weight of this place centered on the memorial for Colonel Hans Christian Heg, commander of the 15th Wisconsin—the “Norwegian Regiment.” Reading about Heg, an ardent abolitionist and a leader beloved by his men, added a deeply personal dimension to the field. His story, ending here on this torn ground, made the immense human cost feel specific and profoundly moving. Standing by his monument, the immense human cost of the struggle felt more specific, more poignant.
Viniard Field, which we looked across, was not a decisive victory for either side, but a bloody stalemate. Yet, the tremendous casualties suffered here over those hours weakened both armies and set the desperate tone for the following day. It was a solemn reminder that the battle’s turning point was built upon the courage and sacrifice of units like Heg’s, fighting in woods so thick that order dissolved into a severe struggle for survival.
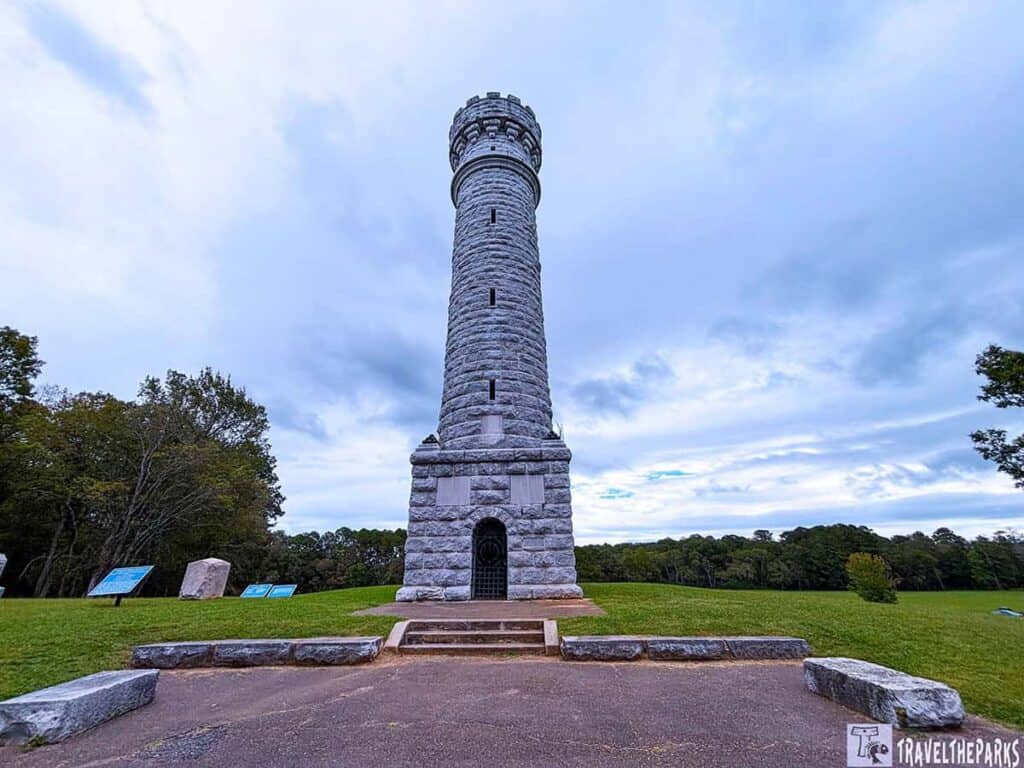
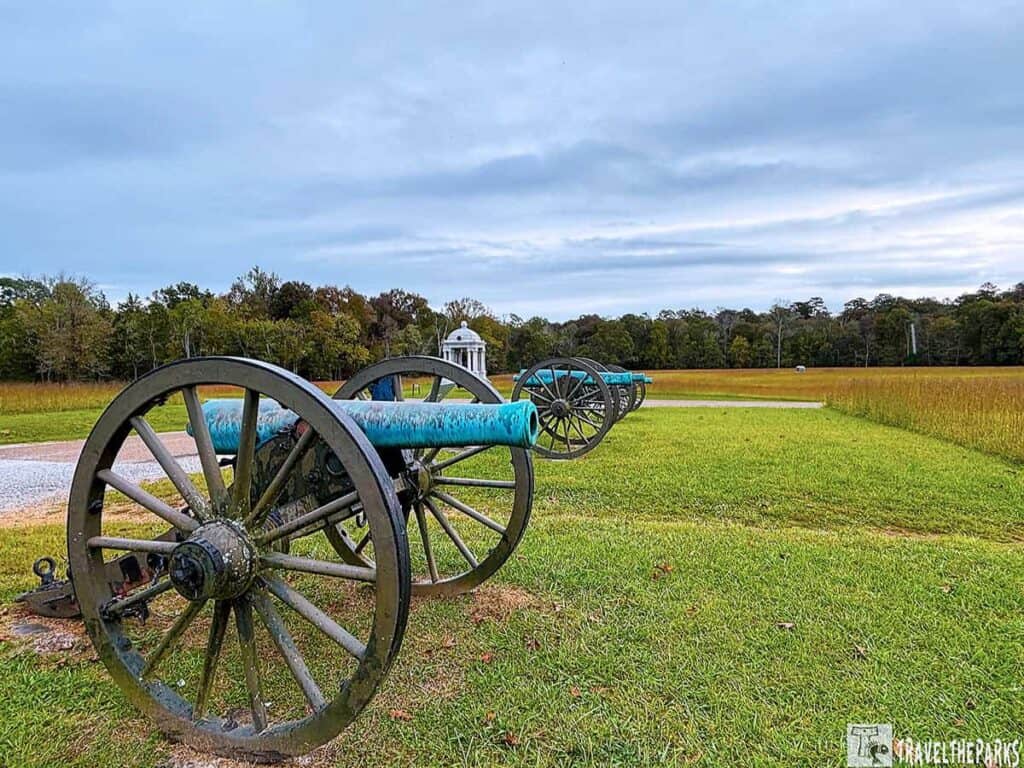
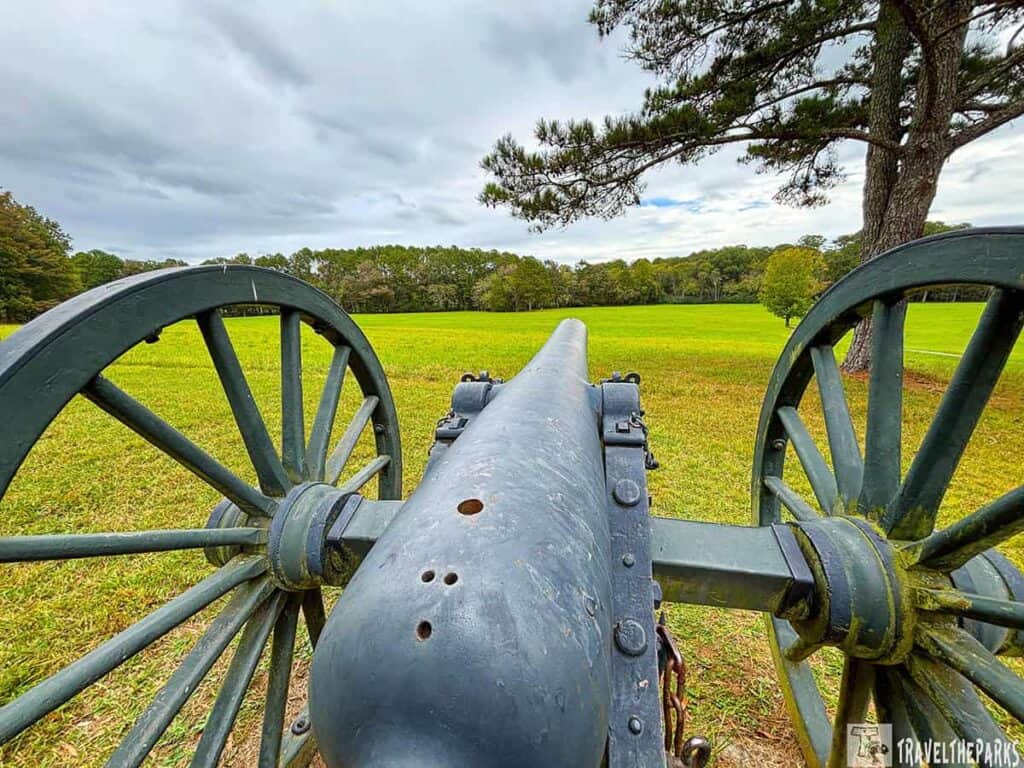
Stop 6: Lighting Strikes: Wilder Brigade
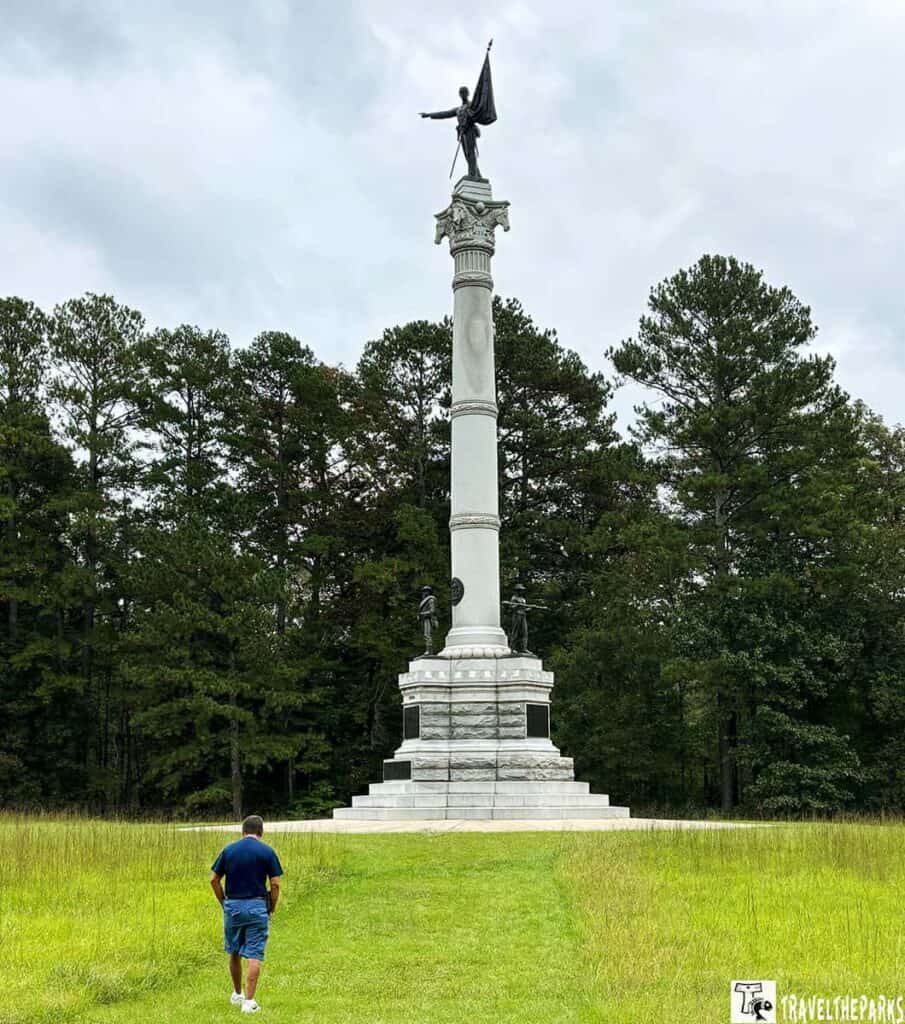
This elevated stop looks out over the ground where the second day’s fiercest, yet most sustained fighting took place. We couldn’t miss the 85-foot limestone tower. Climbing it was a tour highlight. From up top, the view does more than show the landscape. It helps you understand the battle itself. The height gives perspective, and with it comes a sobering sense of just how violent the struggle was.
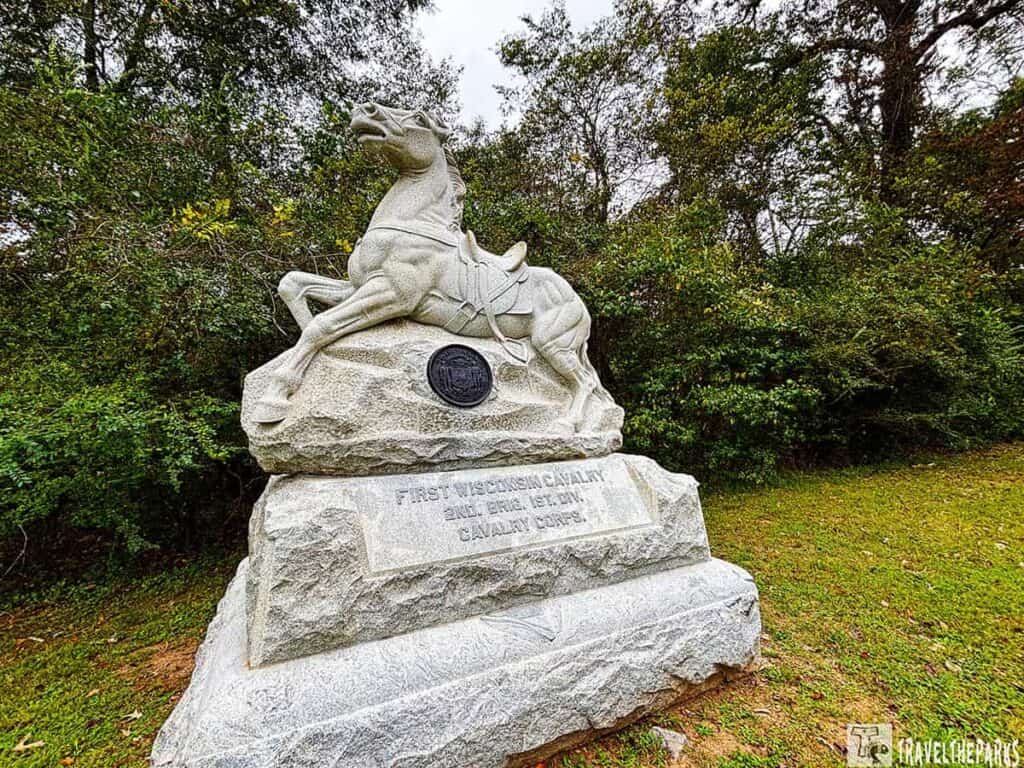
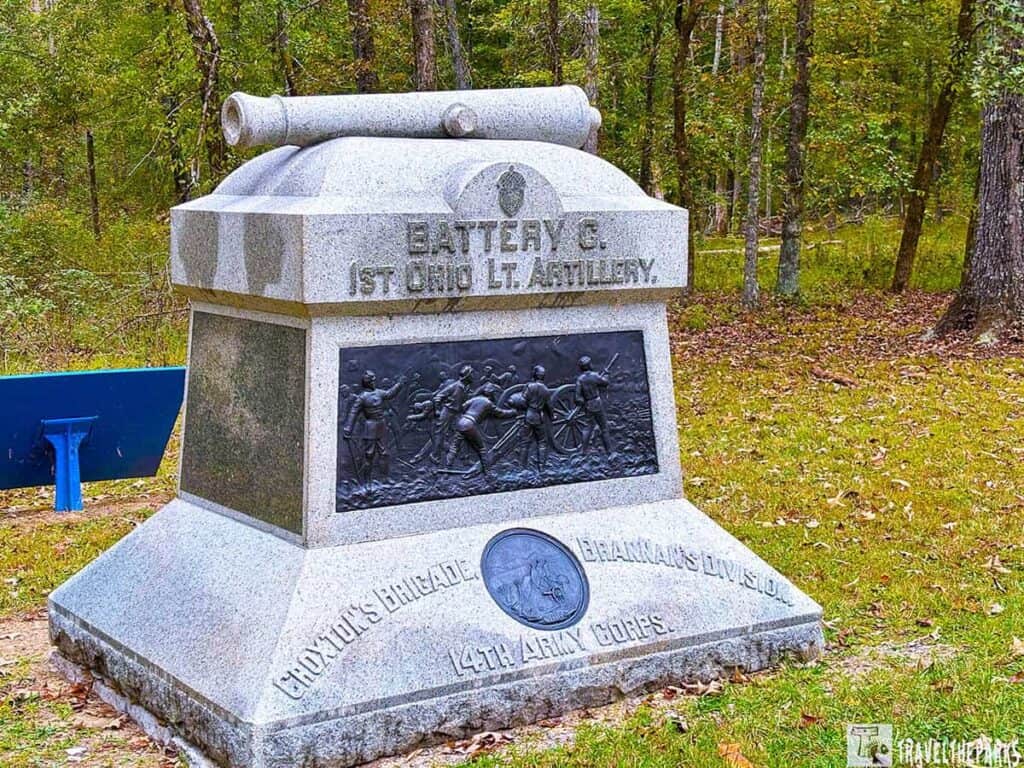
The powerful monuments, especially the First Wisconsin Cavalry Monument, make it easier to imagine the waves of combat that rolled across this field. Yet, amidst the overwhelming Confederate advance, one Union stand stood out. Colonel John T. Wilder’s “Lightning Brigade,” mounted infantry armed with rapid-firing Spencer repeating rifles, unleashed a withering defense.
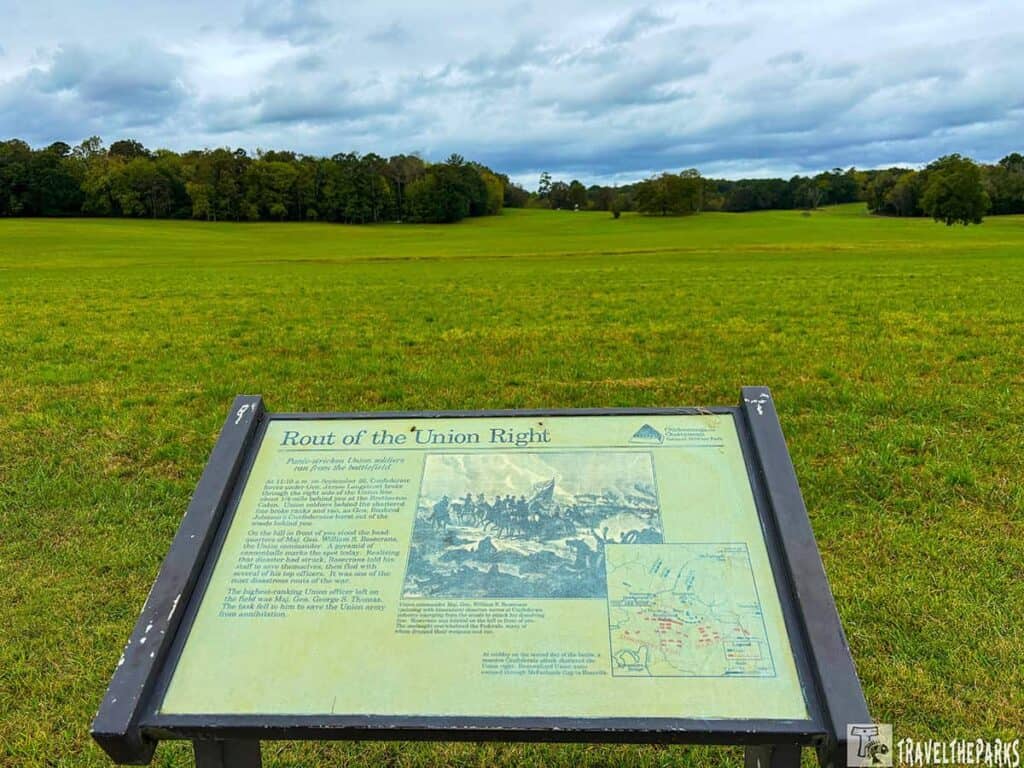
Stop 7: Rout of the Union Right
On September 19, 1863, the battle turned sharply right here. General James Longstreet led Confederate troops in a fierce charge that broke the Union line. One officer called it “a scene of unsurpassed grandeur” as his men charged from the woods into these fields. That push crushed the Union’s right side. Troops fled in wild disorder, and leaders like General Rosecrans raced to Chattanooga.
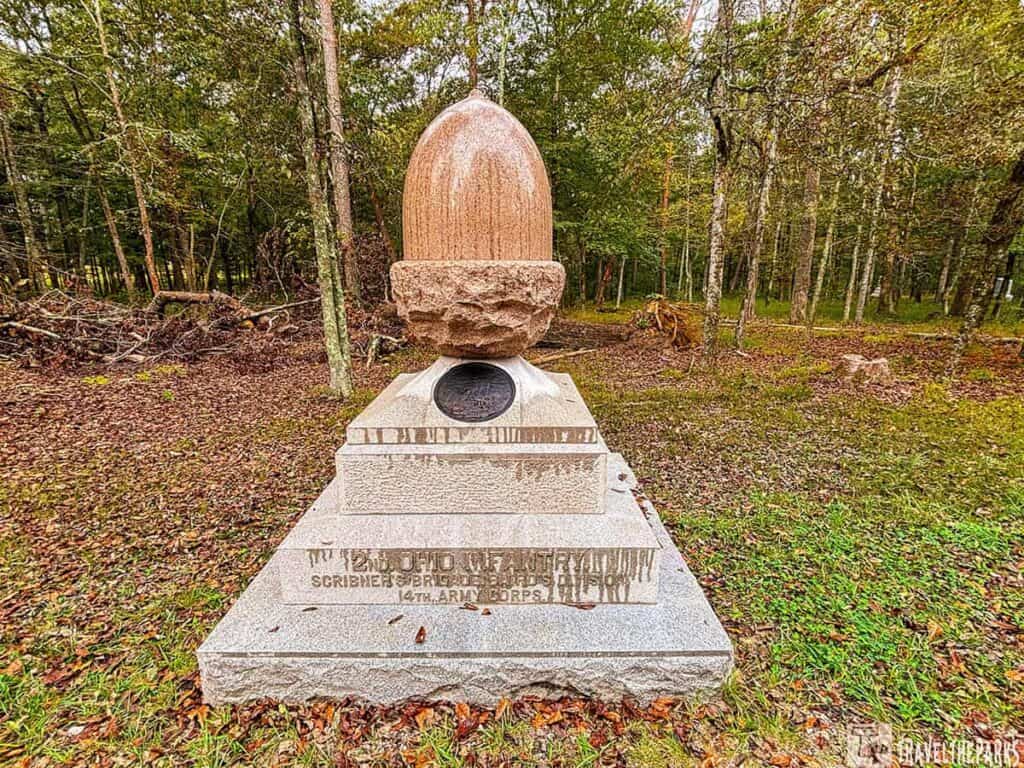
This pivotal moment is now marked by a line of silent monuments along the ridge. Walking among them in the soft fall light, the sheer scale of the sacrifice became clear to us. The ground felt solemn, even grounding. Historical markers and this tour stop help piece together the story, but standing here, surrounded by these stone tributes, offers a far deeper understanding of the chaos and consequence of that day.
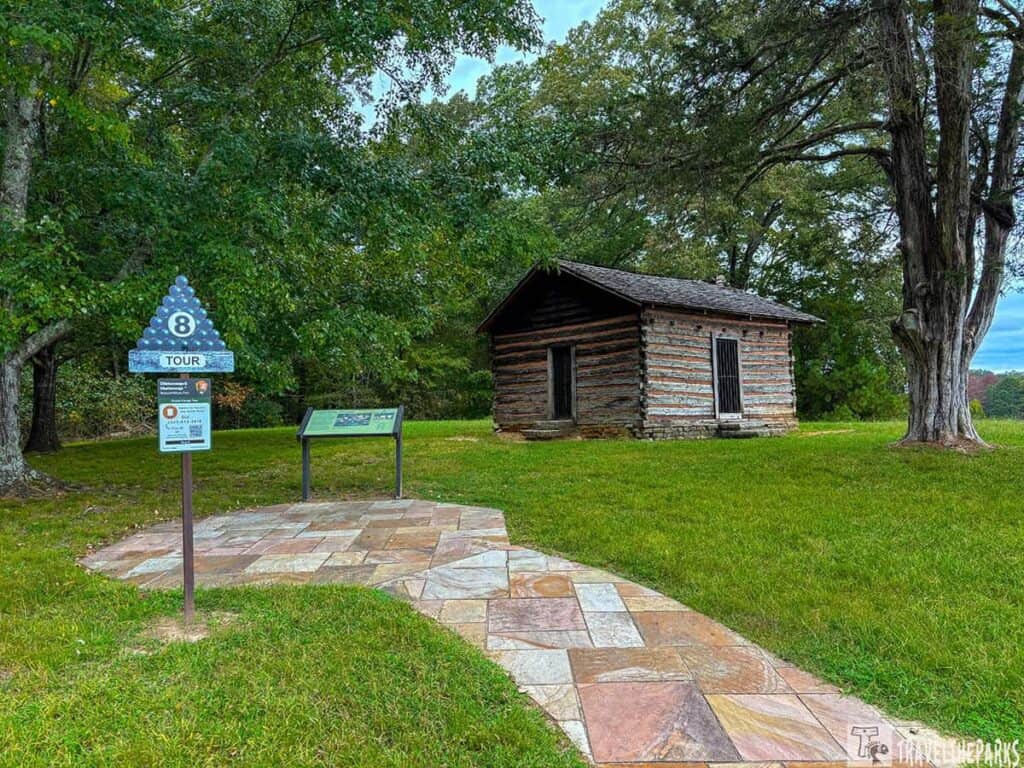
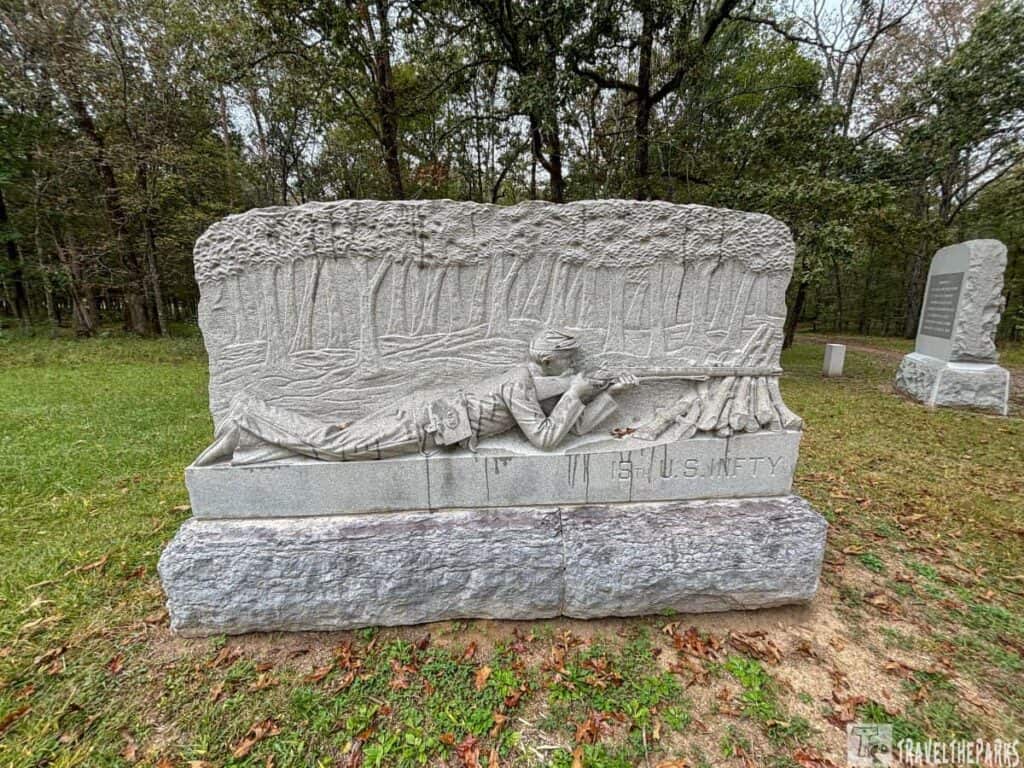
Stop 8: Horseshoe Ridge and Snodgrass Hill
We parked to hike the nearby sites on foot. We walked on the ground where Union troops made their famous last stand. Following the trail, we arrived at Snodgrass Cabin, which was a field hospital, before climbing to Harker Monument. There we saw why General George H. Thomas got the name “The Rock of Chickamauga.” His soldiers held the ridge that long, hard afternoon. They pushed back one Confederate attack after another.
Standing there, we could almost feel the slow burn of daylight fading with the hope of both sides. As darkness finally fell, one final Confederate push met only silence—the remaining Union troops had slipped away toward Chattanooga. Their determined stand had bought the precious time needed for an organized retreat. After three bloody days, the Confederate Army of Tennessee claimed the field, but here, on this quiet ridge, we felt the profound and costly resilience that defined the Union’s stubborn defense.
The Grand Finale: Dyer Field (Monument Row)
Completing the auto tour loop, we drove slowly through the breathtaking expanse of Dyer Field. Lined with magnificent state monuments under the vast fall sky, it served as a profound visual tribute—a perfect, solemn conclusion to our journey. Quieter and less crowded than other stops, this peaceful space, which reflects the aftermath of battle movements, gave us a last chance to pause and reflect in the deepening quiet.
What to Bring on the Chickamauga Battlefield Driving Tour
This is a self-guided experience, so a little preparation goes a long way:
- Comfortable walking shoes (many stops invite short walks)
- Water and light snacks.
- A camera or phone (fall colors are beautiful, but be respectful)
- The official Chickamauga driving tour map, available at the Visitor Center
- Extend Your Day: Combine your drive with a visit to Point Park on Lookout Mountain in Chattanooga for the full story of this critical campaign.
- Go Early or Late: The light is magical at dawn and dusk, and the atmosphere is most serene.
- Pack Patience: This is sacred ground. Drive slowly, stay on the roads, and be mindful as you explore.
- Time of Day: Early morning or late afternoon for best light and fewer crowds.
- Pace: This is not a rushed drive. Give yourself time to step out, read markers, and absorb the landscape.
Final Thoughts: Chickamauga National Military Park auto tour
We parked at each designated spot, got out, and stood on the still fields. Each interpretive sign told the old story, but it was the heavy, quiet truth of the ground itself that hit the hardest.
If you’re looking for a thoughtful, immersive experience, the Chickamauga and Chattanooga National Military Park auto tour is one of the most powerful self-guided drives we’ve ever taken. Whether you’re a history enthusiast or simply curious, this journey delivers a profound encounter that stays with you long after you leave the park.
Our advice? Take your time. Read the markers. Walk the fields. And let Chickamauga speak for itself.
Have you visited Chickamauga? Share your own reflections or favorite stops from the tour in the comments below.


![Statue on a stone pedestal with flags and trees in a park. Transcribed Text: JUAN PONCE DE LEON DISCOVERER OF FLORIDA […] MARCH 1513 THIS LAND WHICH HE CALLED LA FLORIDA ESTABLISHING A RIGHT OF POSSESSION UNDER THE SOVEREIGNTY OF THE CROWNS OF SPAIN AND CASTILE FROM WHICH THIS COUNTRY DERIVES THE NAME OF FLORIDA THIS MEMORIAL ERECTED BY PONCE DE LEON’S DESCENDANTS IN THE RICHEST AGRICULTURAL SECTIONS OF SPAIN AUGUST 1909.](https://traveltheparks.com/wp-content/uploads/2020/12/statue-of-ponce-de-leon-st-augustine-1020-FI-1.jpg)