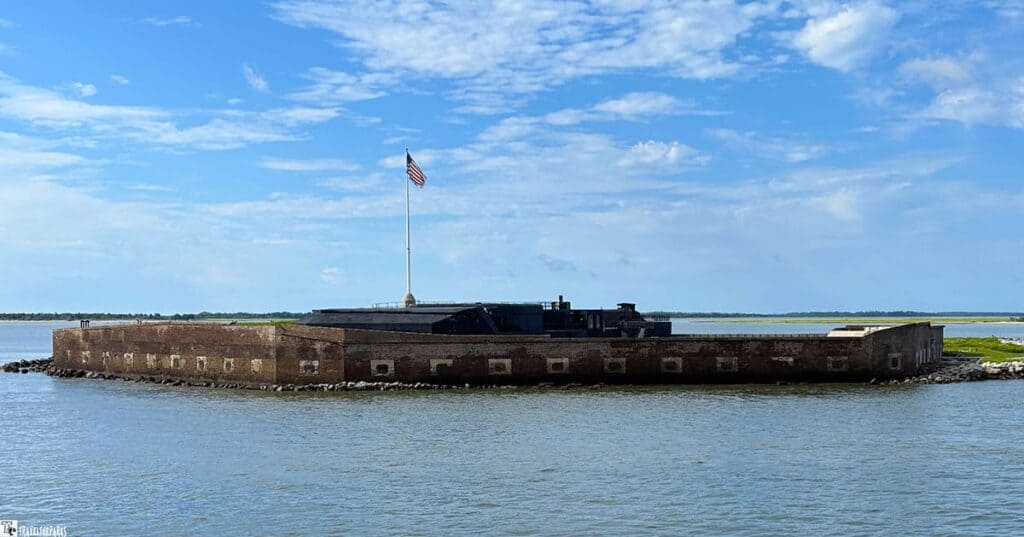
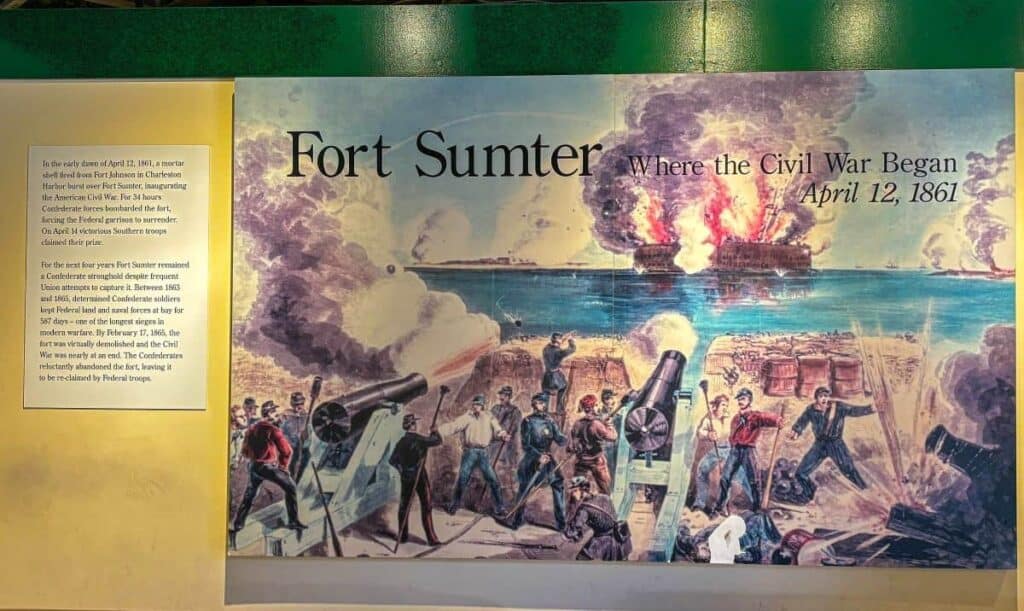
We went to Fort Sumter National Monument on a recent road trip. We explored Fort Sumter on our own self-guided walking tour. Standing where the first shots of the Civil War rang out is a powerful experience. That history came alive as we explored the fort.
This guide gives the same self-guided tour of Fort Sumter we did. It points out key spots. This essential guide will help you explore the fortress at your own pace. We checked out the famous sally port and huge Rodman guns. We saw signs of enslaved workers who built the fort. These Fort Sumter walking tour stops help you grasp the fort’s build, its key role, and the people behind it.
This post may contain affiliate links, meaning if you purchase something through one of these links, we may earn a small commission at no extra cost to you! Read the full disclosure policy here.
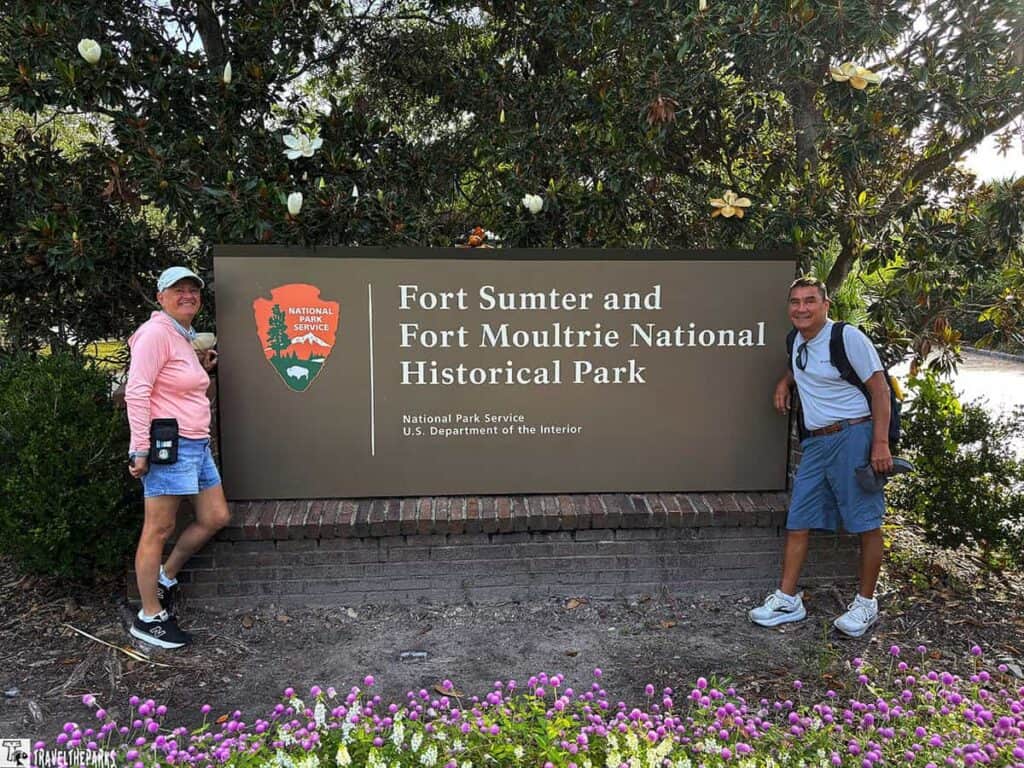
Table of Contents
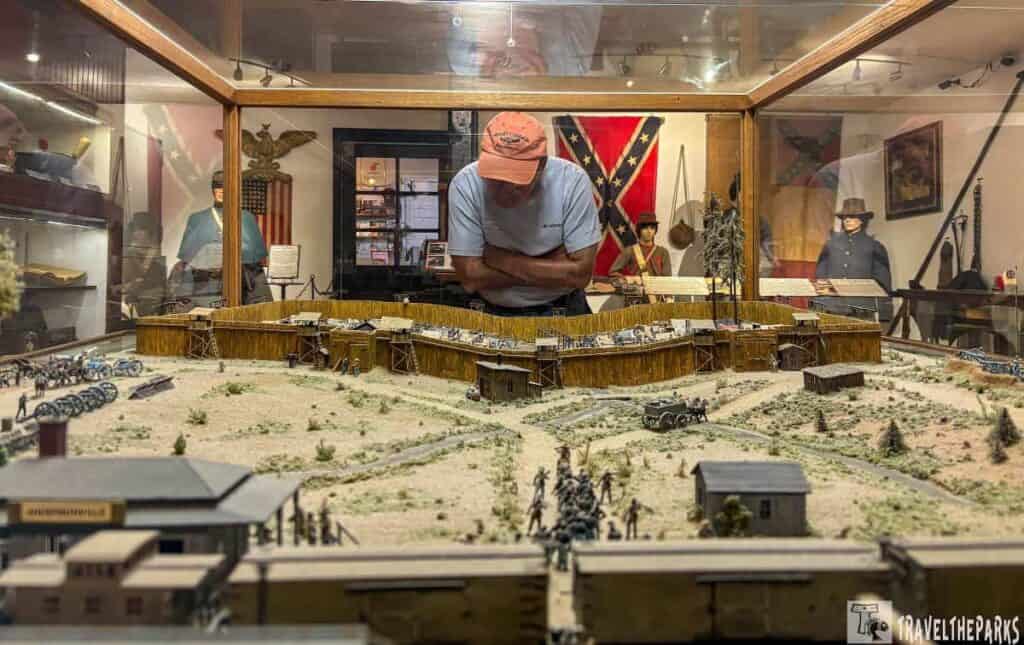
Fort Sumter in Context: A Network of Coastal Defenses
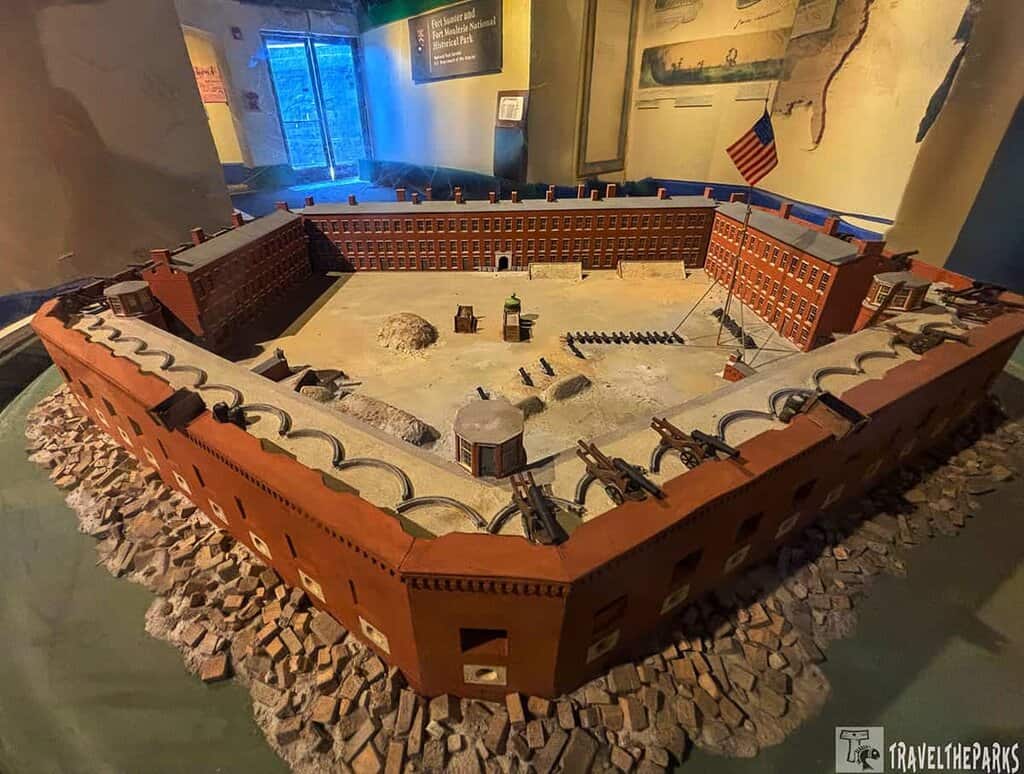
As we walked Fort Sumter’s distinctive pentagonal layout, we noticed how familiar the design felt. That’s because Fort Sumter is part of the Third System of coastal fortifications, built before the Civil War to protect major American ports. Seeing it in person gave us a new appreciation of this nationwide defensive network.

If Fort Sumter sparks your interest in antebellum military history, there are several natural next stops. Just across the harbor, Fort Moultrie on Sullivan’s Island shows another layer of Charleston’s defenses. Down south, Fort Pulaski, near Savannah, illustrates how rapidly rifled cannons made “impregnable” forts outdated. And closer to home, Fort Jackson reveals how coastal defenses evolved into the Second World War. Together, these sites tell a broader story of America’s changing military strategy.
What to See on Your Fort Sumter Self-Guided Walking Tour
This self-guided tour leads you through the ruins of Fort Sumter while uncovering the powerful events that unfolded here. As we walked, we found that each stop built naturally on the last, helping us visualize daily life, wartime destruction, and long-term change.
PRO Tip: If this is your first time visiting, be sure to check out our Complete Guide to Fort Sumter, where we cover ferry details, ticket tips, what to expect on the island, and helpful planning advice before you go.
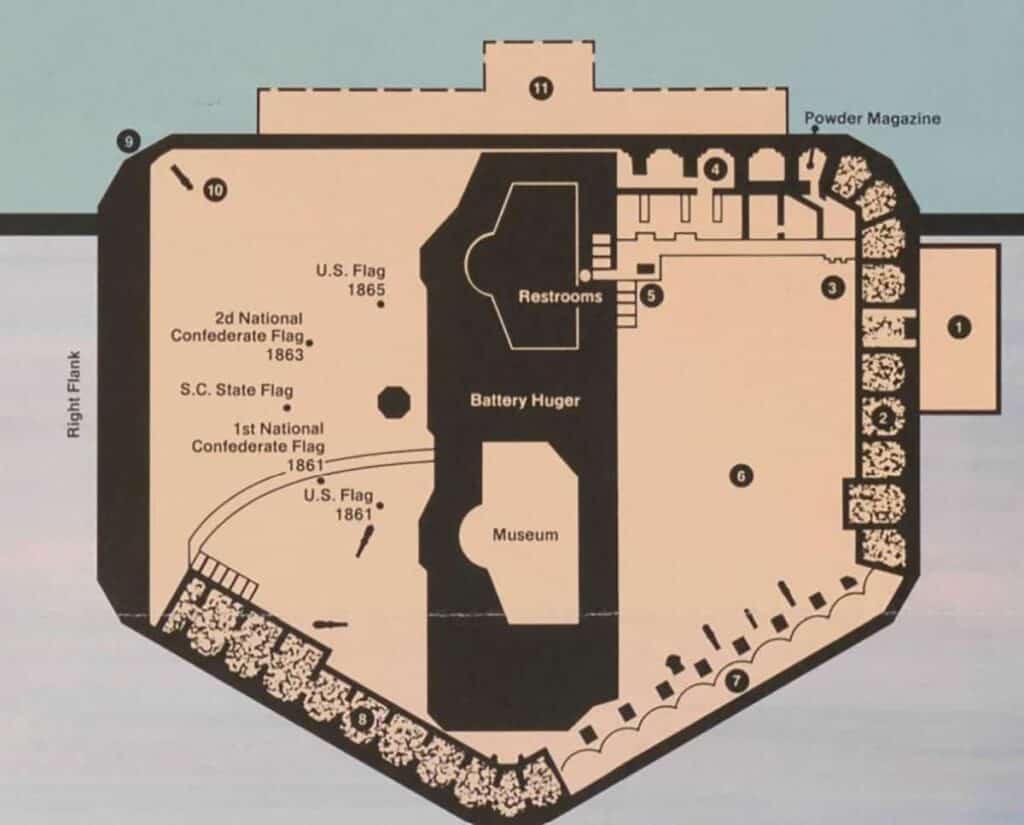
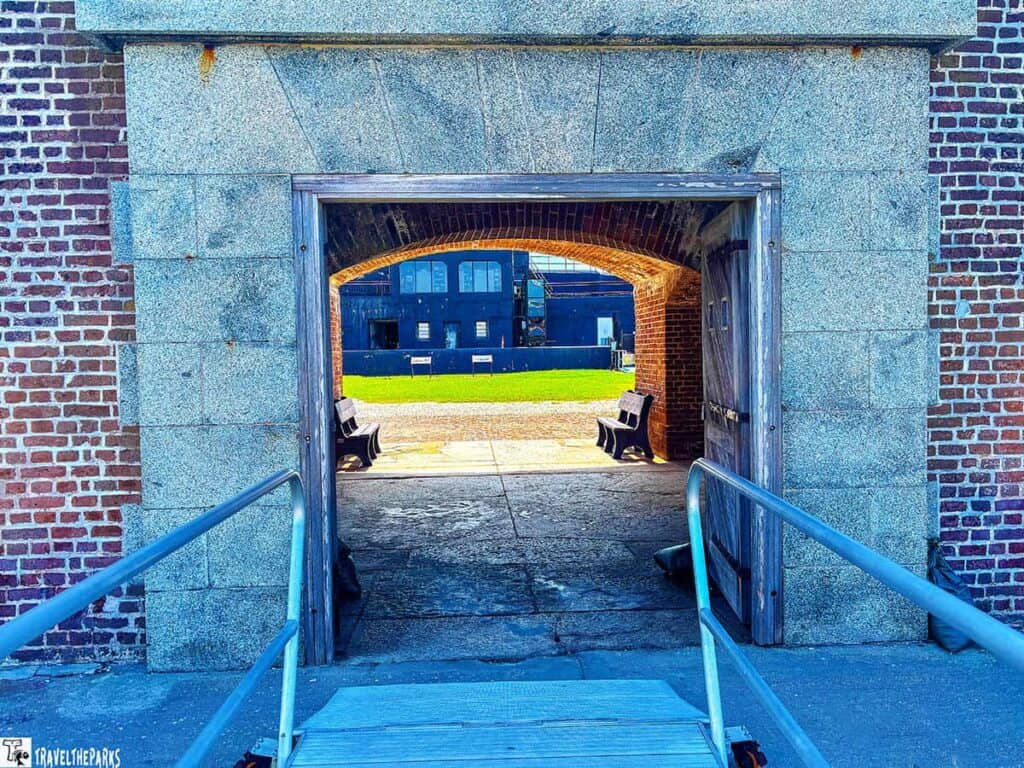
Stop 1: The Sally Port (Main Entrance):
One of the first sights after reaching the island was the sally port. Walking up to it felt like slipping back in time. Although this sally port is not the original structure, it does give a glimpse of the fort layout and its former military architecture during its earlier years. The former entrance faces directly into the three-tiered gorge wall on the back of this fort.
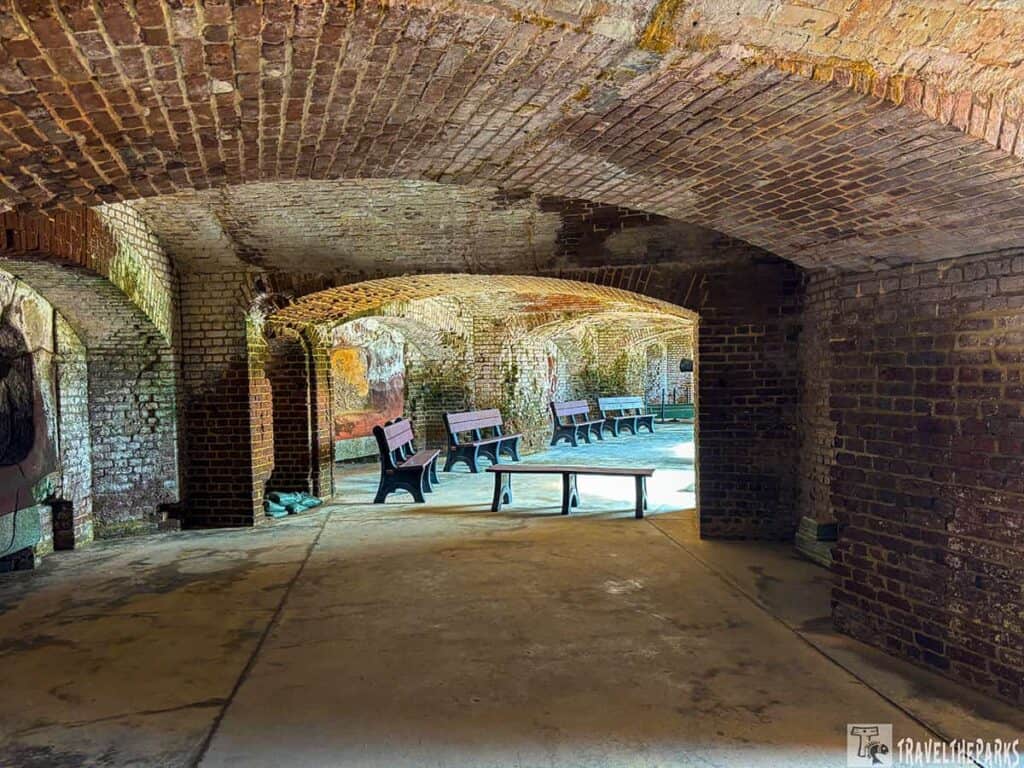
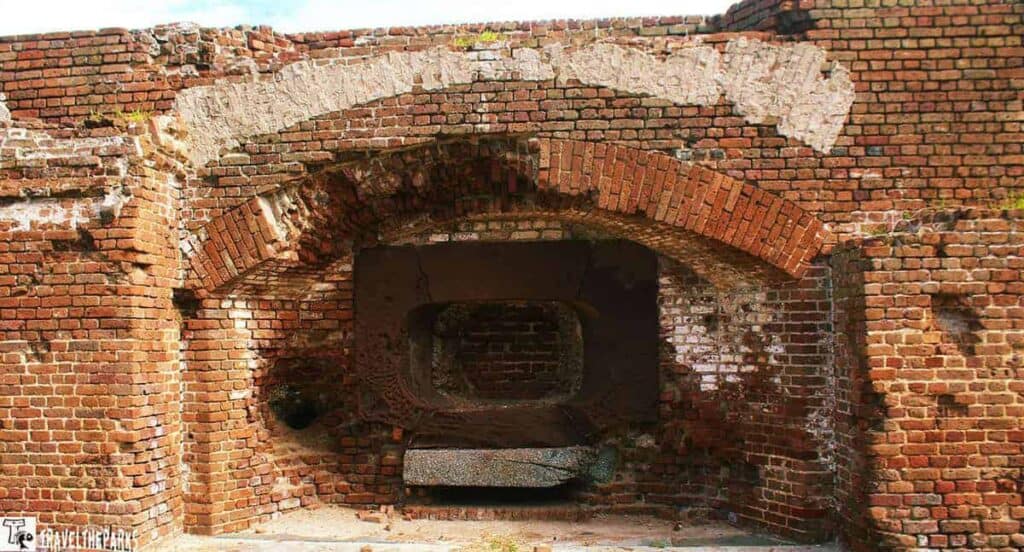
Stop 2: Left-Flank Gunrooms (Casemates):
Here we notice two tiers of arches built into the wall. These are the casemates—protected rooms for the fort’s big cannons. The upper level was built taller than the lower one, a smart and efficient design that was used for the entire front of the fort facing the ocean. These casemates (gunrooms) of the lower tier of the left flank are the only casemates of the original fort open to visitors today.
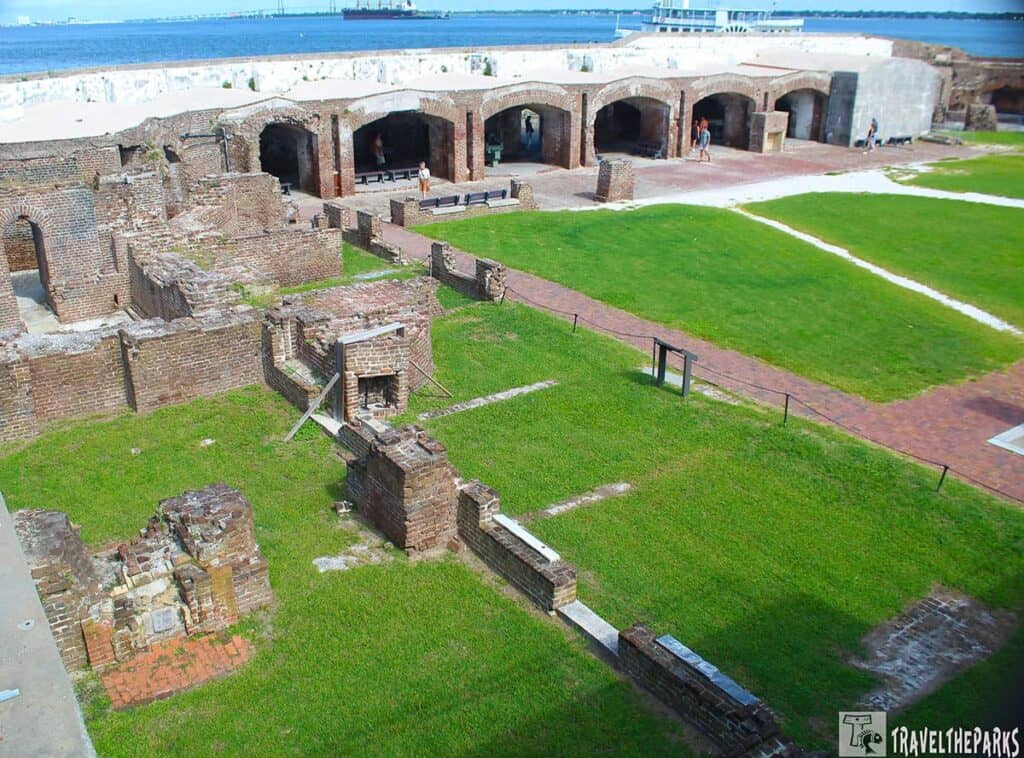
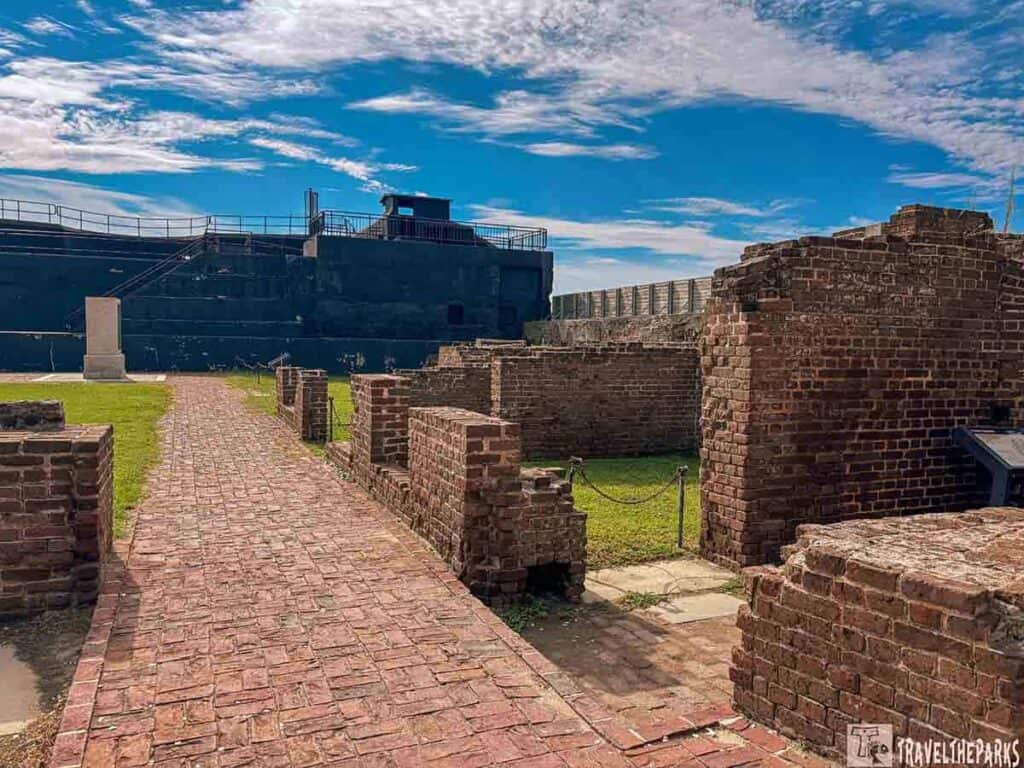
Stop 3: Enlisted Men’s Barracks Ruins: Then we arrived at the ruins of the enlisted men’s barracks. They once towered three stories along this wall. Soldiers grabbed meals in the mess hall below. They slept in tight quarters up above. Right here, we pictured dozens of guys crammed day after day in those small vaulted rooms. It hit home how rough garrison life really was.
Stop 4: The Gorge (The Back Wall)
This wall faced Charleston and took the worst shelling. Oddly enough, this weakest spot took the hardest hits during the 22-month Union siege. Broken bricks today still reveal the raw fury of the blasts.

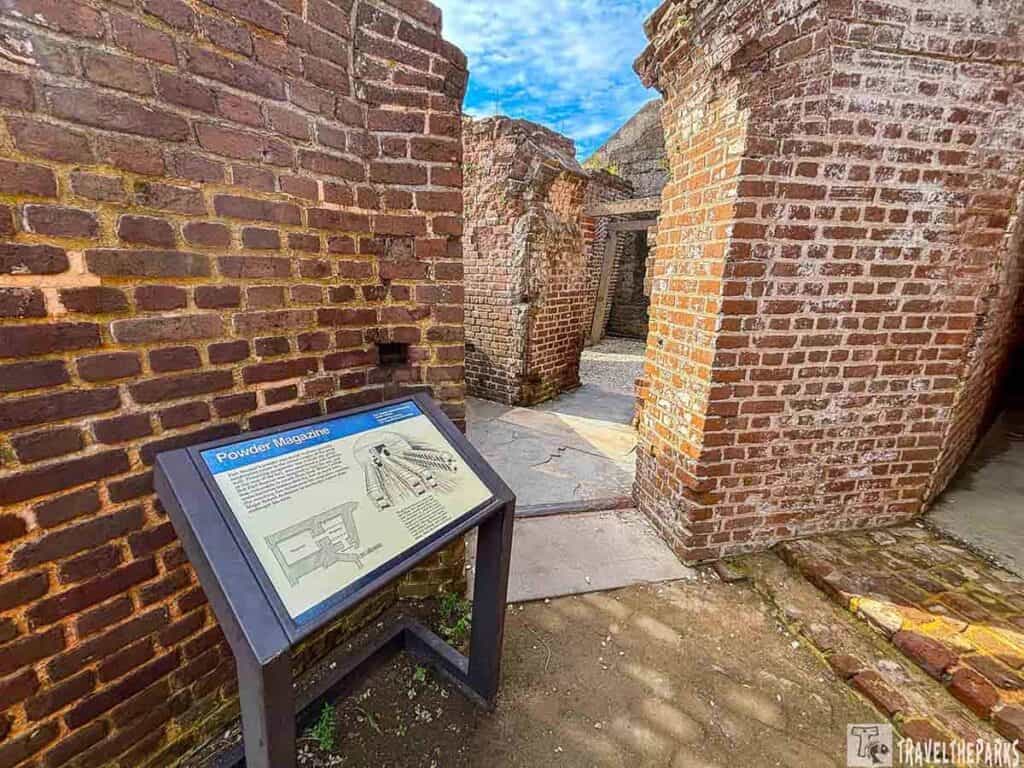
Officers’ Quarters:
Originally, this three-story building ran the entire length of the gorge wall. It provided housing for officers, administrative offices, a guardhouse and storerooms. It was also the site of two major events:
- 1861 Surrender: Fire hit the main powder magazine. It forced everyone to leave.
- 1863 Explosion: A Confederate blast killed 11 men. It knocked the entrance arch off-kilter—still leaning today.
Stop 5: Union garrison monument: We paused at this 1932 granite monument, which honors the Union troops stationed here when the war began.
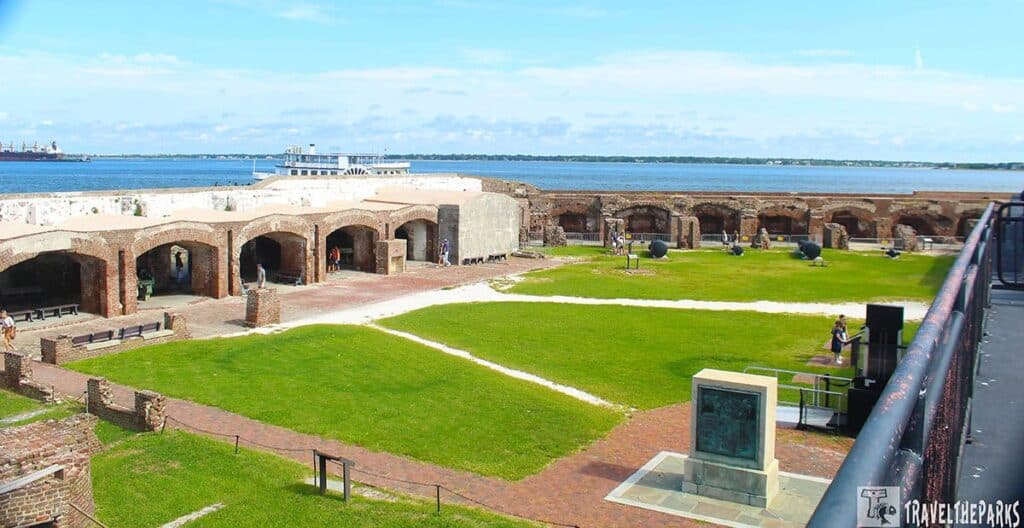
Stop 6: The Parade Ground (The Center) Stepping onto the central parade ground, we imagined soldiers drilling and preparing for battle. In 1899, the Army built Battery Huger here and filled the area with sand, permanently altering this historic space.
PRO Tip: Download the NPS App and the Fort Sumter tour beforehand. It offers a great audio tour and map that you can use even without cell service on the island.
Stop 7: Left-face casemate ruins
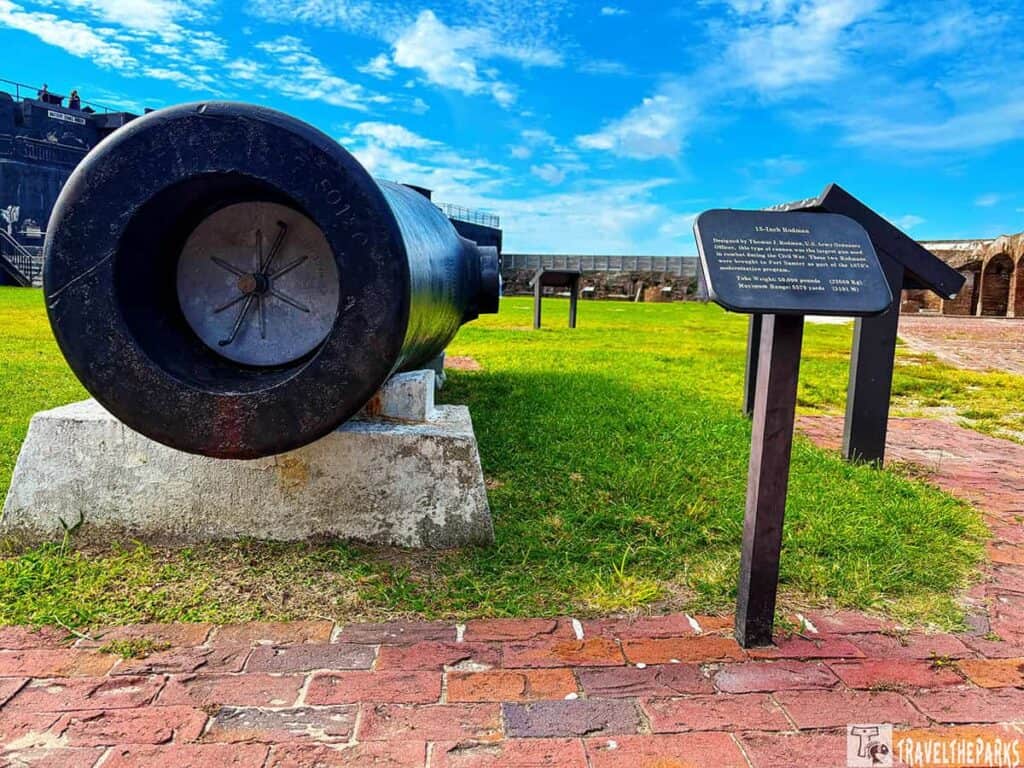
The fort’s left side showed the worst scars. Union cannons on Morris Island blasted it for almost two years. Blast marks from the heavy fire stand out today. Old shells stick in the walls at certain spots. Close by, huge 15-inch Rodman guns and other cannons reveal Civil War might.
Stop 8: Right Face: The right face of the fort revealed a bit of historical irony. During the war, Union forces used eleven Parrott rifles to shell Fort Sumter. In the 1870s, the Army moved those same guns here, transforming former weapons of attack into part of the fort’s defense.
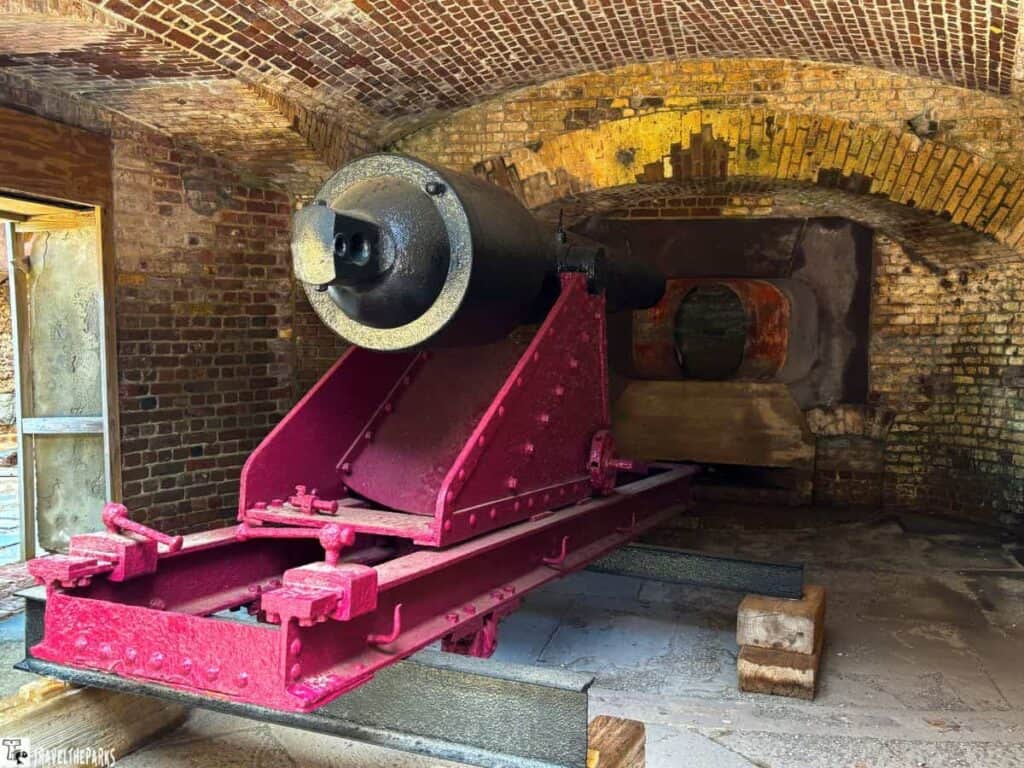
Stop 9: The Right Flank & Atlantic View: From here, you get a prime view of the harbor entrance. That spot shows the fort’s key defense role. It holds two big relics: the huge 15-inch Rodman Gun and the casemate where Captain Abner Doubleday fired the Union’s first Civil War shot on April 12, 1861. Seeing them together powerfully connects place and event.
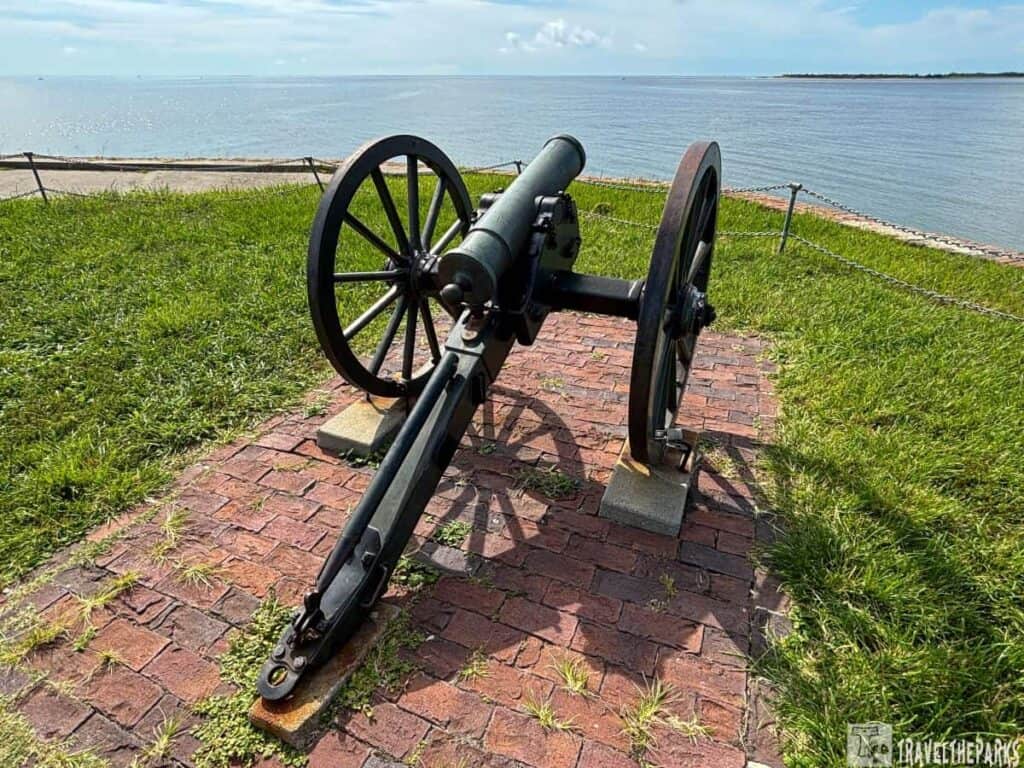
Stop 10: The Versatile Mountain Howitzer
Tucked in the rear corner, this mobile 12-pounder howitzer was used by Confederates to defend against potential infantry landings. Its portability made it a versatile piece of field artillery.

Stop 11: The Fort’s Original Front Door: Our last stretch of the walk has us envision the original look of Fort Sumter. Today’s entrance is not the same as the original, which included a promenade that was 25 feet wide in order to reach the 171-foot-long wharf into the harbor. This was the entry point for supplies, military, and visitors before the first shots were fired.
Final Thoughts Self-Guided Walking Tour Fort Sumter National Monument
A self-guided walk at Fort Sumter draws you close to history in a personal way. Each spot shares a tale, from the opening cannon blast to the end of the fight. This itinerary guides your steps with a clear aim and fresh insight.
Pack comfy shoes and water. Set aside 30-60 minutes for the full visit. Use our downloadable checklist that outlines all the stops. Above all, stop and hear the wind, the waves, and history’s faint whispers.
History isn’t just in textbooks—it’s in the bricks we walk on and the harbors we look across. Which stop on this tour are you most excited to see in person?